
Restore Your Pearls’ Luster: The Ultimate Guide
Pearls are timeless treasures, demanding your gentlest touch.
How to Clean Pearl Jewelry at Home , simply wipe your pearls with a soft, lint-free cloth dampened with lukewarm water after each wear. For a deeper clean, use a few drops of mild, pH-neutral soap in water, apply it with the cloth pearl by pearl, and then “rinse” with a clean, water-dampened cloth. Always lay your pearls flat to dry completely before storing them.
The Soul of the Sea: Why Pearls Demand Special Care
Have you ever held a pearl and felt its unique, almost living warmth? It’s not your imagination. Unlike diamonds forged in the earth’s fiery mantle or emeralds crystallized under immense pressure, pearls are organic gems. They are born from living creatures, oysters and mussels, as a defense mechanism against an irritant. Think of it as nature’s most beautiful immune response. This organic origin is the very essence of their allure, but it’s also the source of their vulnerability. They require a completely different approach to care than their mineral-based counterparts.
Understanding this fundamental difference is the first step toward becoming a true pearl caretaker, not just an owner. Your other gemstones can likely handle a rough tumble in an ultrasonic cleaner or a quick scrub with a household cleaner, but subjecting a pearl to such treatment would be a catastrophe. It’s like comparing the needs of a delicate orchid to that of a hardy cactus. Both are beautiful, but their care routines are worlds apart. Embracing the gentle, mindful process of pearl care is not just about maintenance; it’s about honoring the delicate miracle of their creation.
Understanding Pearl’s Organic Nature
A pearl is composed of countless, microscopic layers of a substance called nacre, which is primarily made of aragonite (a form of calcium carbonate) crystals held together by an organic protein “glue” called conchiolin. Picture an onion, but with layers so thin and lustrous they refract light in a way that creates that mesmerizing, deep glow we call orient. This layered structure, while beautiful, is incredibly soft. On the Mohs scale of mineral hardness, pearls rank a mere 2.5 to 4.5. For context, a diamond sits at a solid 10, and your own fingernail is about a 2.5. This means your pearls can be scratched by something as simple as a metal key, a zipper, or even the prongs of another piece of jewelry in your collection.
This composition of calcium carbonate is also what makes pearls highly susceptible to acids and chemicals. Even mild acids, like those found in vinegar or lemon juice, can literally dissolve the nacre, permanently dulling the finish and eating away at the pearl’s surface. This isn’t just a surface stain we’re talking about; it’s irreversible damage to the very structure of the gem. That’s why your approach to cleaning must be one of absolute gentleness, using only materials and solutions that respect the pearl’s delicate, organic makeup and preserve its irreplaceable luster for generations to come.
The Enemies of Luster: What Damages Pearls?
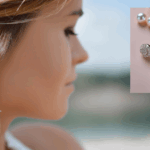
The world is full of potential threats to your pearls’ delicate beauty. The biggest culprits are often the very products we use to make ourselves beautiful. Perfumes, hairsprays, lotions, and cosmetics are packed with chemicals and alcohols that can be incredibly harsh on a pearl’s surface. These substances can coat the nacre, dulling its shine, and over time, the acidic components can begin to eat away at its delicate layers. This is the origin of the cardinal rule of pearl care: “Last on, first off.” Your pearls should be the very last thing you put on after your beauty routine is complete, and the very first thing you take off before you get ready for bed.
Beyond cosmetics, simple everyday substances can pose a risk. The natural oils and acids in your skin, while unique to you, can slowly degrade a pearl’s luster over time. Sweat, in particular, is acidic and can be quite damaging if left to sit on the pearl’s surface. This is why a gentle wipe-down after every wear is not just a suggestion but a crucial preventative measure. Furthermore, be mindful of environmental factors. Extreme heat can dry out pearls, causing the nacre to crack, while storing them in an airtight environment like a plastic bag can lead to deterioration due to a lack of moisture. They need to breathe. Understanding these everyday enemies is your best defense in the quest to keep your pearls luminous and lovely.

The Pre-Clean Ritual: Gathering Your Gentle Arsenal
Before a single drop of water touches your precious pearls, it’s essential to assemble the right toolkit. Think of this as your pearl’s personal spa tray. Rushing this step and grabbing the nearest dish towel or soap can lead to unintentional damage, from microscopic scratches that dull the surface to chemical reactions that erode the nacre. The goal is preservation, not just cleaning. Taking a moment to gather the correct, gentle supplies ensures that your cleaning process will enhance your pearls’ beauty, not diminish it.
This preparation is a mindful practice. It forces you to slow down and consider the delicate nature of what you’re about to handle. You’re not scrubbing a pot; you’re tending to an organic gem. The tools are simple and inexpensive, but their properties are critically important. Choosing the right cloth and the right cleanser is 90% of the battle. Getting this part right transforms a potentially risky chore into a safe and effective ritual that will keep your pearls looking as radiant as the day they were harvested. Let’s build your perfect pearl-cleaning kit.
Selecting the Perfect Cloth
The choice of cloth is paramount. You need something incredibly soft that won’t leave behind any lint or, more importantly, create micro-abrasions on the pearl’s delicate surface. Your best options are a high-quality microfiber cloth, like one used for cleaning eyeglasses or camera lenses, a soft chamois leather cloth, or a piece of 100% cotton fabric from an old, well-worn t-shirt. These materials are non-abrasive and highly absorbent, making them perfect for both gently applying a cleaning solution and for drying the pearls afterward. The fine fibers of microfiber are particularly effective at trapping and lifting away oils and grime without requiring any harsh rubbing.
What should you absolutely avoid? Steer clear of any fabric with a noticeable texture, such as terry cloth towels, as the loops can catch on prongs and are too rough for the pearl’s surface. Paper towels and tissues are also a major no-go. While they may feel soft to you, they are made of wood pulp fibers that can be surprisingly abrasive at a microscopic level, leaving tiny scratches that accumulate over time and lead to a dull, lackluster appearance. Investing in a dedicated, pearl-only cleaning cloth is a small step that pays huge dividends in the long-term health and beauty of your jewelry.
Choosing a Pearl-Safe Cleanser
When it comes to the cleaning agent itself, simplicity and neutrality are your guiding principles. The absolute safest and most effective cleanser for pearls is a solution of lukewarm water mixed with a tiny amount of a mild, pH-neutral soap. Think of products like pure, unscented Castile soap or even a high-quality, gentle baby shampoo. The key is to avoid anything with harsh detergents, degreasers, ammonia, chlorine, or acidic ingredients. Read the label—if it boasts “degreasing power” or contains citrus elements, it’s not for your pearls. You need a cleanser that will gently lift away body oils and dirt without stripping the nacre.
A good rule of thumb is to mix about two to three drops of your chosen mild soap into a bowl of about one cup of lukewarm water. You’re not looking for a bubbly, sudsy bath; you just want the water to be slightly soapy to the touch. There are also commercially available pearl cleaners on the market. If you choose to go this route, purchase one from a reputable jeweler and read the ingredients list carefully. Ensure it is specifically formulated for pearls and not a general-purpose jewelry cleaner. When in doubt, the simple homemade solution of mild soap and water is the most reliable and time-tested option, endorsed by gemologists and jewelers worldwide.
The Basic Cleanse: Your Weekly Pearl Refresh
Consistent, gentle care is far more effective than infrequent, aggressive cleaning. You don’t need to perform a deep clean on your pearls every time you wear them. In fact, over-cleaning can be just as detrimental as neglect, especially if it involves too much moisture reaching the silk thread of a necklace. The most important habit you can cultivate is a simple, quick refresh after each wear. This basic cleanse takes less than a minute but is the single most effective way to prevent the gradual buildup of harmful substances.
Think of it like brushing your teeth. You do it every day to prevent plaque buildup, rather than waiting for a major problem and then needing a deep, intensive cleaning. The same logic applies to your pearls. By making this a non-negotiable part of your routine—taking them off and immediately giving them a gentle wipe—you are actively preserving their luster and extending their life. This small act of maintenance is a powerful ritual that ensures your pearls remain radiant and ready for their next outing.
The Post-Wear Wipe-Down: A Crucial Habit
This is the cornerstone of all pearl care. As soon as you take off your pearl necklace, bracelet, or earrings, make it an ingrained habit to give them a quick, gentle wipe-down with your designated soft, dry cloth. The goal here is to remove any trace of skin oils, perspiration, makeup, or perfume that may have come into contact with the pearls throughout the day. These residues, while invisible, are the primary culprits behind the slow erosion of a pearl’s nacre and the yellowing of its color over time. By removing them immediately, you prevent them from having the chance to do their damaging work.
For a necklace or bracelet, hold one end and gently run the cloth over each pearl, rotating the strand as you go. For earrings and rings, carefully wipe the pearl’s surface, being mindful not to snag the cloth on any prongs or metal settings. This dry wipe is sufficient for most daily wear. It’s a simple, two-minute ritual that will do more to preserve your pearls than any other single action. It reinforces the “first off” part of the “last on, first off” rule, creating a complete circle of care that will keep your pearls looking spectacular for years, if not decades.
The Quick Damp Cloth Method
If your pearls have been exposed to more sweat than usual—perhaps on a warm day or at a lively event—or if they look a little dull, a slightly damp cloth can provide a bit more cleaning power without resorting to a full deep clean. Take your soft, pearl-safe cloth and dip a small corner into a bowl of lukewarm water. Squeeze it out thoroughly until it is just barely damp, not wet or dripping. The importance of this cannot be overstated, especially for strung pearls. Excess water can seep into the drill holes of the pearls and weaken the silk thread, causing it to stretch, discolor, and eventually break.
Gently wipe each pearl with the damp portion of the cloth to lift away any residue. Immediately follow up by wiping them again with the dry part of the cloth to remove any lingering moisture. This method provides that little extra clean without the risks associated with submersion. It’s the perfect intermediate step between the daily dry wipe and the occasional deep clean. For pearl rings or pendants where the pearl is set in metal, this method is often all you’ll ever need, as there’s no silk thread to worry about. It’s a quick, safe, and effective way to restore that immediate shine.
The Deep Dive: A Step-by-Step Guide to a Thorough Clean
Every so often—perhaps once or twice a year, or when they’ve been visibly soiled—your pearls will benefit from a more thorough cleaning. This is the “spa day” we’ve been building up to. It’s a more involved process than the daily wipe-down, but it’s still grounded in the same principles of extreme gentleness. This deep clean is designed to remove accumulated grime from the pearl surfaces and from the tiny crevices around settings and clasps.
It’s crucial to set aside some uninterrupted time for this task. Rushing through a deep clean is how mistakes happen. Lay out a soft towel on your workspace to protect both the pearls and your furniture. Assemble your gentle arsenal: the bowl of lukewarm water, your mild soap, and your soft cloths. This deliberate process isn’t just about restoring beauty; it’s an act of connection with your treasured possessions. Follow these steps carefully, and you’ll be able to safely and effectively restore your pearls to their full, luminous glory.
[Image Placeholder: A clear bowl of lukewarm water with a couple of drops of mild soap being added. The scene is well-lit and clean, emphasizing the gentle nature of the process.] Alt Text: Preparing a gentle cleaning solution for pearls by adding a drop of mild soap to a bowl of lukewarm water.
Preparing Your Gentle Cleaning Solution
The heart of your deep clean is the solution itself. Get this right, and everything else follows. Fill a small, clean bowl with approximately one cup (about 250ml) of lukewarm water. The temperature is important: water that is too hot can damage the pearls and weaken the silk cord, while cold water is less effective at dissolving body oils. “Lukewarm” should feel just slightly warm to the touch, like a comfortable bath. Next, add your chosen pearl-safe cleanser. You need very little—two or three drops of a pH-neutral liquid soap like Castile soap or gentle baby shampoo is more than enough.
Swirl the water gently with your finger to disperse the soap. You are not aiming for a mountain of suds or a frothy bubble bath. The water should just become slightly cloudy or feel slippery between your fingers. This diluted solution is strong enough to break down the oils and dirt that have accumulated on your pearls but gentle enough that it won’t harm the delicate nacre or the organic conchiolin that binds it together. Resist the temptation to add more soap, thinking it will clean better. In this case, less is truly more. A stronger solution can leave a dulling film on the pearls and is harder to “rinse” off completely.
The Delicate Cleaning Process for Necklaces and Bracelets
Never, ever submerge a pearl necklace or bracelet in water. This is the most common and damaging mistake people make. Soaking the strand saturates the silk or nylon cord, causing it to lose its tensile strength, stretch out, and become susceptible to mildew and breakage. Instead, you will clean each pearl individually. Dip a corner of your soft cloth into the mild, soapy water and squeeze it out until it is just damp. Take the strand and, one by one, gently wipe the entire surface of each pearl. You can use a soft, circular motion.
As you clean each pearl, you’re not just removing dirt; you’re also inspecting your jewelry. Pay attention to the areas where the pearl meets the drill hole and the knots in between—this is where grime loves to hide. After you have wiped all the pearls with the soapy cloth, take a second clean cloth, dampen it with plain lukewarm water, and squeeze it out thoroughly. Go over each pearl again, using this “rinse” cloth to remove any soap residue. This two-step wipe-down ensures the pearls are clean without ever compromising the integrity of the string that holds them all together. It’s a patient process, but the results are worth the effort.
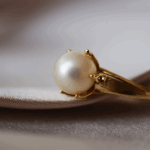
Tackling Earrings, Rings, and Pendants
Cleaning pearl jewelry that features metal settings, like rings, earrings, and pendants, requires a slightly different technique. Here, you’re dealing with two different materials—the soft, organic pearl and the hard, durable metal. While the pearl still cannot be submerged, the settings can often accumulate more dirt and grime in their intricate details. For these pieces, a cotton swab (like a Q-tip) can be your best friend. Dip the cotton swab into your mild, soapy solution, and gently clean the surface of the pearl as before.Then, use a fresh, damp swab to carefully clean around the base of the pearl, in the crevices of the setting, and on the metal parts. The small tip of the swab allows for precision, so you can clean the metal without being too aggressive on the pearl itself. If the metal is particularly tarnished (and it’s silver or gold), you can use a jeweler’s polishing cloth, but be extremely careful to only rub the metal parts, avoiding the pearl entirely. After cleaning with the soapy swab, use another swab dampened with plain water to “rinse” away the soap residue from both the pearl and its setting. This targeted approach ensures both components of your jewelry are beautifully cleaned and cared for.
Post-Spa Treatment: Drying and Storing Your Pearls
The cleaning process isn’t over once the dirt is gone. The drying and storage phase is just as critical to the long-term health of your pearls. Improper drying can lead to a stretched cord and a misshapen necklace, while incorrect storage can cause scratches, dehydration, or chemical damage. Think of this as the “cool-down” phase of your pearl’s spa day. It’s the final, crucial step that locks in the benefits of the cleaning and protects your investment until its next appearance.
This final stage is all about patience and creating the right environment. Pearls have a delicate relationship with moisture—they need a little to stay hydrated, but too much is a disaster. Properly drying and storing them respects this delicate balance, ensuring that your newly cleaned jewelry remains strong, lustrous, and safe. Let’s cover the essential final steps that will keep your pearls in heirloom-quality condition.
The Art of Air-Drying Pearls Safely
After you have finished the final “rinse” wipe, you must allow your pearls to dry completely before storing them. For strung pieces, this is especially critical. Lay a clean, dry, and soft towel on a flat surface. Gently place your pearl necklace or bracelet on the towel, ensuring it is laid out flat and straight. Never hang your pearls to dry. The weight of the pearls, combined with a moist cord, will cause the silk or nylon thread to stretch significantly. This not only creates unsightly gaps between the pearls but also severely weakens the cord, making it much more likely to snap.
Allow the jewelry to air dry for at least 24 hours. Yes, a full day. It might seem excessive, but it can take that long for the cord inside the drill holes of the pearls to dry out completely. Even if the surface feels dry to the touch, moisture could still be trapped within. Patience here is a virtue that prevents future heartbreak from a broken strand. For rings and earrings, the drying time is much shorter, but it’s still good practice to lay them on a soft cloth for an hour or so to ensure all moisture has evaporated from the settings before you put them away.
Creating the Perfect Home for Your Pearls
Where your pearls live when you’re not wearing them matters immensely. Because they are so soft, they should always be stored separately from other jewelry. Tossing them into a communal jewelry box is a recipe for scratches and nicks from the harder gemstones and metal edges of your other pieces. The ideal home for your pearls is a soft pouch made of silk, velvet, or chamois, or a fabric-lined jewelry box with a dedicated compartment just for them. This protects them from abrasive encounters and keeps them safe.
Furthermore, pearls need to breathe. They contain a small amount of water in their composition, and they benefit from the natural humidity in the air. For this reason, you should never store them in an airtight environment like a plastic baggie or a safe deposit box for extended periods. Lack of humidity can cause the nacre to dry out, become brittle, and crack. If you live in a particularly arid climate, you can even place a small glass of water in the room where you store your pearls to add a bit of moisture to the air. Proper storage is the final act of love for your pearls, ensuring they remain safe and hydrated between wears.

Common Pearl Cleaning Mistakes to Avoid at All Costs
In the world of pearl care, what you don’t do is just as important as what you do. Well-intentioned owners, armed with cleaning “hacks” from the internet or applying general jewelry care knowledge, can inadvertently cause irreversible damage to their precious pearls. It’s easy to assume that what works for a diamond ring will work for a pearl necklace, but this is a dangerous misconception.
Understanding the common pitfalls can save you from a heartbreaking experience. These are not just minor faux pas; they are actions that can strip the luster, crack the nacre, or dissolve the very surface of your pearls. Before you even think about cleaning, commit these “nevers” to memory. Avoiding these catastrophic errors is fundamental to preserving the life and beauty of your organic gems.
The Ultrasonic Cleaner Catastrophe
Jewelers often use ultrasonic cleaners to blast grime off of hard gemstone jewelry. These machines work by sending high-frequency sound waves through a tank of cleaning solution, creating millions of microscopic bubbles that implode and scrub the jewelry clean. For hard stones like diamonds, rubies, and sapphires, this is an incredibly effective process. For a pearl, it is a death sentence. The intense vibrations can easily cause the delicate, layered nacre of the pearl to shatter, crack, or peel apart. It can also dislodge pearls from their settings.
Some ultrasonic cleaners have variable settings, and a jeweler might claim they can use a “gentle” cycle, but the risk is simply not worth it. The organic conchiolin that holds the nacre layers together is no match for these powerful vibrations. If you ever take your pearl jewelry to a professional for cleaning, make it explicitly clear that it should not, under any circumstances, be placed in an ultrasonic cleaner. This is a non-negotiable rule. The damage is swift and irreversible, turning a lustrous gem into a dull, fractured mess in a matter of minutes.
The Dangers of Household Chemicals
Your kitchen and bathroom cabinets are a minefield of pearl-destroying substances. Many common household cleaners and DIY “solutions” are dangerously acidic or alkaline, and they will react chemically with the calcium carbonate in your pearls. Let’s be crystal clear: never use vinegar, lemon juice, baking soda, ammonia, chlorine bleach, or any cleaner containing these ingredients. Acidic substances like vinegar and lemon juice will literally dissolve the nacre, leaving a dull, etched, and permanently damaged surface. Think of the science experiment where you dissolve an eggshell in vinegar—it’s the same chemical principle at work.
Abrasive substances like baking soda or toothpaste, sometimes touted as gentle cleaners, will act like sandpaper on the soft surface of your pearls, scratching away the luster. Harsh alkaline chemicals like ammonia and bleach are equally destructive, breaking down the organic conchiolin protein that binds the nacre layers together, causing the pearl to become brittle and fall apart. Stick to the tried-and-true method: a drop of mild, pH-neutral soap in lukewarm water. It’s boring, but it’s safe. When it comes to pearls, boring is beautiful.
Addressing Specific Pearl Predicaments
While routine cleaning will handle most situations, you may eventually encounter a more specific challenge. Perhaps you’ve inherited a beautiful but neglected string of pearls, or you’ve noticed a stubborn spot or a gradual yellowing on your favorite pair of earrings. These situations require a more nuanced approach, combining the principles of gentle care with a realistic understanding of what can and cannot be fixed at home.
It’s important to approach these predicaments with extra caution. Some issues, like a dirty surface, are easily remedied. Others, like deep-set stains or the natural aging process, may be permanent or require the intervention of a skilled professional. Knowing the difference is key to avoiding further damage. Let’s look at how to handle some of the more common pearl problems you might face.
How to Clean Vintage or Heirloom Pearl Jewelry
Handling vintage or heirloom pearls is a special responsibility. These pieces carry not just monetary value, but immense sentimental worth. Before you even think about cleaning them, your first step should be a thorough inspection. Pay close attention to the cord on a necklace or bracelet. Is it discolored, frayed, or stretched? Are the knots tight and uniform, or are they loose? If the cord looks fragile in any way, do not attempt to clean it at home. The moisture and gentle manipulation of cleaning could be the final straw that causes it to break. In this case, take it directly to a trusted jeweler who specializes in pearl restringing.
If the cord appears strong and the pearls are simply dirty, you can proceed with the standard deep cleaning method: the individual pearl wipe-down with a mild, soapy solution. Be even more gentle than you would with a newer piece. Vintage pearls may have become more porous or dry over time. After cleaning, inspect the clasp and any metal settings for signs of wear and tear. Cleaning heirloom jewelry is as much about assessment as it is about cleansing. It’s your opportunity to check its overall health and decide if a professional’s touch is needed to ensure it can be safely worn and passed down to the next generation.
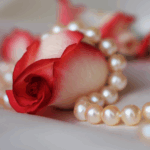
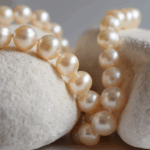
Speaking of gorgeous vintage pieces, if you’re looking to add a touch of timeless elegance to your collection, consider the exquisite craftsmanship of a classic strand. This Beautiful Vintage Pearl Necklace captures that heirloom quality perfectly, showcasing the enduring allure of pearls that have been cherished and cared for. A piece like this deserves the gentle cleaning techniques we’ve discussed to maintain its splendor.
Dealing with Stains and Discoloration
Discovering a stain or yellowing on your pearls can be distressing. Yellowing is often a natural part of the aging process, especially if the pearls were stored in an airtight environment for a long time, causing the conchiolin to dehydrate. Unfortunately, this kind of deep, uniform yellowing is largely irreversible. Some jewelers offer professional treatments to whiten pearls, but these can be harsh and may compromise the pearl’s long-term integrity. The best approach is prevention through proper storage and regular wear, as the moisture from the air and your skin can help keep them hydrated.
For localized stains—perhaps from a drop of wine or a makeup smudge—you may have some luck if you act quickly. Immediately blot the stain with a soft, damp cloth. You can then try the mild soap and water cleaning method, focusing gently on the stained area. Do not rub vigorously. If the stain persists after a gentle cleaning, do not escalate to harsher methods. You are more likely to damage the nacre surrounding the stain than you are to remove it. At this point, it’s time to accept the mark as part of the pearl’s story or consult a professional jeweler. They can assess the nature of the stain and tell you if any safe, professional options are available.
Beyond Cleaning: The Holistic Approach to Pearl Care
True pearl preservation goes beyond a simple cleaning routine. It’s a holistic approach that encompasses how you wear them, how you store them, and when you seek professional maintenance. Cleaning removes the daily grime, but a long-term care strategy ensures the structural integrity and foundational beauty of your jewelry for a lifetime. It’s about seeing the bigger picture and understanding that each component—the pearl, the string, the clasp—works together.
This comprehensive view involves preventative maintenance, much like servicing a car. You don’t wait for the engine to fail before you change the oil. Similarly, you shouldn’t wait for your pearl necklace to break before you think about the health of its cord. Adopting this proactive mindset will save you from potential loss and ensure that your cherished pearls can be enjoyed without worry. Let’s explore the two key pillars of this holistic approach: restringing and professional consultation.
The Importance of Regular Restringing
The silk or nylon cord that holds your pearl necklace together is its lifeline, but it is not immortal. Over time, the cord naturally stretches and weakens due to the weight of the pearls, exposure to body oils, and the simple friction of wear. The knots between each pearl, which are there to prevent you from losing all your pearls if the strand breaks, also collect dirt and can degrade the cord. This is why regular restringing is not an optional luxury but an essential part of pearl ownership.
So, how often should you do it? The general rule of thumb is to have your pearls restrung if you wear them frequently (once a week or more), or every three to five years if you wear them occasionally. A clear sign that it’s time is to hold the necklace by the clasp and look at the pearls near it. If you can see excess space between the pearls, it means the cord has stretched, and it’s time for a visit to the jeweler. A professional restringing, usually on fresh silk with new knots, costs a fraction of the value of the necklace and provides invaluable peace of mind.
When to Call in the Professionals
While this guide empowers you to handle routine care at home, it’s equally important to recognize when a task is best left to a professional. DIY enthusiasm is wonderful, but it has its limits, especially when dealing with valuable and sentimental items. A trusted jeweler or gemologist has the expertise, specialized tools, and experience to handle issues that are beyond the scope of at-home care. Attempting to fix a broken clasp, tighten a loose setting, or remove a deep-set stain yourself can easily lead to a much bigger and more expensive problem.
You should seek professional help for several key situations: for any and all restringing needs, if a pearl has come loose in its setting on a ring or earring, if a clasp is broken or not functioning securely, or if your pearls have suffered damage or deep staining that gentle home cleaning cannot resolve. Building a relationship with a local jeweler you trust is a wise investment. They can not only perform repairs but also offer expert advice tailored to your specific pieces, ensuring your pearls receive the highest standard of care throughout their long and beautiful life. For more detailed information on pearl care standards, the Gemological Institute of America (GIA) provides an authoritative resource that aligns with professional best practices.
Conclusion
Caring for your pearl jewelry at home is not a complicated chore but a gentle, mindful ritual. It’s a practice rooted in understanding and respecting the unique, organic nature of these ocean gems. By embracing the core principles we’ve explored, you empower yourself to be the best possible guardian of your treasured pieces. Remember the golden rules: “Last on, first off” to protect them from chemicals; a gentle wipe-down after every wear to remove harmful oils; and a deep clean only when necessary, using nothing more than a soft cloth and a mild, soapy solution.
Never surrender to the temptation of harsh chemicals or aggressive tools like ultrasonic cleaners. Always dry your pearls flat to protect their cord, and store them separately in a soft, breathable pouch. By following this path of gentle, consistent care, you are not just cleaning a piece of jewelry. You are preserving its luster, honoring its history, and ensuring that its timeless beauty will endure, ready to be passed down and cherished for generations to come.
FAQs (Frequently Asked Questions)
1. Can I use toothpaste to clean my pearls? No, absolutely not. Toothpaste is abrasive and will create microscopic scratches on the soft surface of your pearls, permanently dulling their luster. Stick to a mild, pH-neutral soap and water solution.
2. How often should I perform a deep clean on my pearl necklace? A deep clean is only necessary occasionally. If you wear your pearls often, a deep clean once or twice a year is sufficient. For pearls worn only on special occasions, once every few years may be all that’s needed. The post-wear wipe-down is the most important regular maintenance.
3. My white pearls have started to look yellow. Can I whiten them at home? Unfortunately, significant yellowing, which is often caused by dehydration of the pearl’s organic components, is very difficult and often impossible to reverse at home. The best “cure” is prevention through proper storage and regular wear. Avoid any DIY whitening “hacks,” as they will damage your pearls.
4. Is it safe to get my pearls wet at all? It is safe to get the pearl surface wet with a damp cloth, but you should never submerge or soak a strung pearl necklace or bracelet in water. Excess water weakens the silk cord, causing it to stretch and break. Always dry pearls thoroughly after cleaning.
5. What is the “last on, first off” rule? This is the most important rule of pearl care. “Last on” means you should put your pearls on only after you have finished applying all makeup, perfume, and hairspray. “First off” means they should be the first thing you take off before your evening routine to avoid contact with cleansers and lotions.
6. The string on my necklace looks dirty. Does cleaning the pearls help? Wiping the pearls will not clean the silk string. A dirty, discolored string is a sign of age and accumulated oils, and it indicates that the strand is due for restringing. A professional jeweler will use a fresh, clean silk cord, which will instantly revive the look of your necklace. To understand why pearls are so soft and need this care, you can learn more about the Mohs scale of mineral hardness, which clearly shows their delicacy compared to other gems.